This week in my creative photography class we got to test out our pinhole cameras. The first light leak test failed, light leaks everywhere. A couple test later I was able to fix the leaks with graffers tape. I was ready to make my first negative. . I cant believe the results! Its so sharp, wide and it worked! Heres the result:
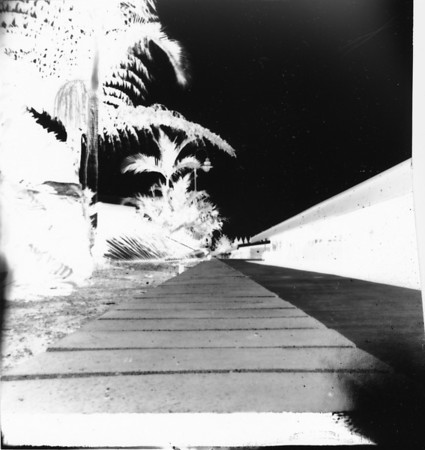
(30 second exposure time. I used Black and White Ilford RC (Resin Coated) paper. Notice the light leaks )

This is the first pinhole camera I’ve ever made. I based the design roughly off of the Santa Barbara pinhole camera.I made this camera for less than $15. I highly recommend this project to anyone with access to a darkroom.
DIY: Pinhole Camera
** If you hurt yourself or any of your possessions while attempting this DIY, you are solely responsible for your actions and results. While this DIY’s danger level is low I assume no responsibly for your actions.**
Materials:
- One box or object ( as light tight as possible). I bought a bird breeding box for my camera.
- Graffers or Duck tape
- Flat or Matte black spray paint
- Tin cookie or pie pan
- Needle or tack
- Drill
- Large circular drill bits
** The deeper the box or object the more telephoto the image will be and the smaller the hole is the wider the image will be. Finding the right combination may take some luck and multiple attempts**
Step One:
Cut out a large circle with your drill bit in the center of the front side of your box or object.
Step Two:
Paint the inside of your “camera” with your flat or matte spray paint. Let it dry.

Step Three:
Cut out a square of tin (from you pie plate/cookie sheet) large enough to cover the hole drilled in step one.
Step Four:
With your poking device ( I used a tack) make a hole in the center of the square tin. Make the hole as small as possible. I held mine up to the light to make sure I made a clean hole. The cleaner/smaller the hole the sharper your image will be.
Step Five:
Tape your tin square on the inside of your camera box. Make sure you don’t cover the pinhole and cover all around the tin so no light sneaks through.

Step Six:
Cut some tape large enough to cover your outside large hole. This will be your shutter.

Step Seven:
Test the camera for light leaks. In a darkroom, insert your paper emulsion side facing the pinhole. Take the camera outside for 30 seconds. Do not take the tape off the covering your pinhole. After 30 seconds bring the camera back into the darkroom and put your photo in the developer, if after 1 minute the paper stays white, your good to go…. No light leaks! If you see black marks/lines you have light leaks and will need to tape/patch them up. Repeat the test until successful.
Step Eight:
Reload the camera in the dark room. Take the camera out and expose the image for 30 seconds but this time you will take off the tape covering your pinhole to expose the image and cover up the pinhole when times up. After you develop this print you may have to adjust the exposure time to get a properly exposed image. Have Fun! I will be updating you as I print more, especially when I try positive paper and add a flash.
